The Dental Implant Procedure: What to Expect at Every Stage
A dental implant procedure is a multi-stage oral surgery to permanently replace a missing tooth. The process involves placing a titanium post into the jawbone, allowing 3–6 months for osseointegration (bone fusion), attaching an abutment connector, and fitting a custom porcelain or zirconia crown. The full procedure typically spans 4–8 months from consultation to final restoration, with a 95–98% success rate. In 2026, guided surgery with 3D-printed surgical guides and AI-assisted planning has significantly improved precision and reduced complication rates.
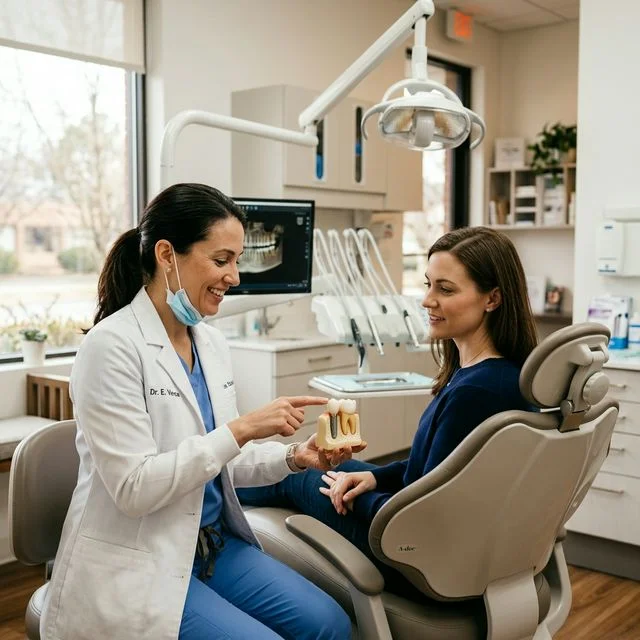
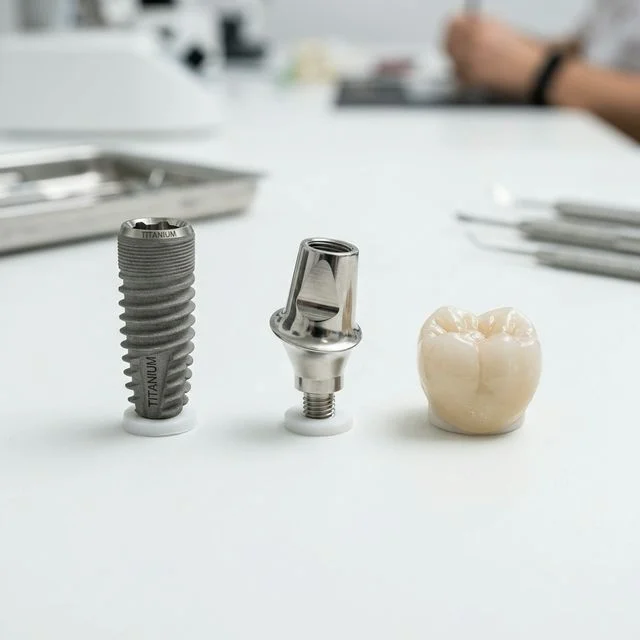
A dental implant procedure is a multi-stage surgical process that replaces a missing tooth root with a biocompatible titanium or zirconia fixture, onto which a custom prosthetic crown is attached. While the process typically spans 3–9 months from consultation to final restoration, understanding each step eliminates uncertainty and helps you prepare both physically and financially.
This guide walks you through every stage of the implant journey — from candidacy evaluation to the day your permanent crown is seated — drawing on clinical protocols followed by board-certified oral surgeons (AAOMS) and periodontists.
Are You a Candidate? (Medical Evaluation)
Key Candidacy Factors
Not every patient is an immediate candidate for dental implants. Your oral surgeon or periodontist will evaluate several factors:
- Bone volume and density: Adequate alveolar bone (typically ≥ 6 mm height, ≥ 5 mm width) is required. A CBCT scan provides precise 3D measurements. If bone is insufficient, augmentation procedures like bone grafting or sinus lift can rebuild the ridge.
- Gingival health: Active periodontal disease (periodontitis) must be treated and stabilized before implant placement. Untreated gum disease is the leading cause of implant failure.
- Systemic health: Uncontrolled diabetes (HbA1c > 8%), active smoking, immunosuppressive therapy, and bisphosphonate use increase complication risk. These conditions don't necessarily disqualify you, but they require careful management.
- Age considerations: Implants are generally not placed in patients under 18 whose jaws are still growing. There is no upper age limit — healthy patients in their 80s and 90s routinely receive implants.
For patients with limited bone volume who want to avoid extensive grafting, mini dental implants offer a less invasive alternative worth discussing with your surgeon.
Step 1: Initial Consultation & 3D Imaging
Your first appointment includes:
- Comprehensive oral examination: Assessment of remaining teeth, gum health, bite alignment (occlusion), and the edentulous (toothless) area.
- Cone Beam CT Scan (CBCT): A 3D radiograph that maps your jawbone anatomy with sub-millimeter precision — including the location of the inferior alveolar nerve canal, mental foramen, maxillary sinus, and available bone dimensions. Cost: $250–$600.
- Digital treatment plan: Using software (such as Nobel Clinician, DTX Studio, or Blue Sky Plan), the surgeon virtually plans the exact implant position, angulation, and depth before any surgery occurs.
- Cost estimate: You'll receive a comprehensive treatment plan with line-item pricing. Use our Cost Calculator to validate the estimate.
Step 2: Tooth Extraction (If Needed)
If the damaged tooth is still present, it must be extracted before (or simultaneously with) implant placement:
- Simple extraction: $150–$300 for teeth that are fully erupted and mobile.
- Surgical extraction: $200–$500 for fractured, impacted, or ankylosed teeth requiring bone removal.
- Immediate implant placement: In some cases, the implant can be placed directly into the extraction socket at the same appointment, reducing total treatment time by 3–4 months. This technique works best for single-rooted teeth with adequate bone around the socket.
Step 3: Bone Grafting (When Required)
Approximately 50% of implant patients require some form of bone augmentation. Common procedures include:
- Socket preservation graft: Bone graft material placed immediately after extraction to maintain ridge volume. Cost: $400–$800.
- Ridge augmentation: Rebuilding a deficient ridge using particulate bone graft covered by a resorbable collagen membrane. Cost: $800–$1,500.
- Sinus lift (sinus floor elevation): Necessary for upper posterior teeth where the maxillary sinus has expanded into the ridge. Cost: $1,500–$3,000.
- Healing time: Bone grafts typically require 4–6 months of integration before the site is ready for implant placement.
Step 4: Implant Placement Surgery
The Surgical Protocol
The surgical appointment itself usually lasts 1–2 hours per implant and follows this protocol:
- Anesthesia: Local anesthesia (lidocaine or articaine) to numb the surgical site. IV sedation or oral sedation is available for anxious patients.
- Flap elevation: A small incision in the gum tissue exposes the underlying bone. (In flapless guided surgery, no incision is needed — the implant is placed through a small punch in the gum.)
- Osteotomy: A sequence of calibrated drills (2.0 mm → 2.8 mm → 3.5 mm → final diameter) creates a precisely sized channel in the bone at the planned depth and angulation.
- Implant insertion: The titanium fixture is threaded into the osteotomy at a controlled torque (typically 25–45 Ncm). Primary stability is assessed.
- Closure: A healing cap or cover screw is placed, and the gum tissue is sutured closed.
Choose your implant system carefully — surface technology and design directly affect osseointegration speed. Compare options with our Brand Comparator or read our brand comparison guide.
Step 5: Osseointegration (Healing Period)
Osseointegration — the biological process by which bone cells grow directly onto the implant's micro-roughened surface — is the foundation of implant success. This is the longest phase of treatment:
- Standard timeline: 3–6 months depending on bone quality, implant system, and patient health factors.
- Accelerated healing: Modern surface technologies like Straumann SLActive® and Nobel Biocare TiUltra™ have demonstrated faster osseointegration in clinical trials, potentially reducing healing to 6–8 weeks in favorable bone conditions.
- During this period: You may wear a temporary restoration (flipper, essix retainer, or provisional crown) to maintain esthetics and function. A soft-food diet is recommended for the first 2–4 weeks.
Track your recovery day-by-day with our Recovery Timeline tool.
Step 6: Abutment Placement
Once osseointegration is confirmed (via clinical testing and/or post-operative radiograph), the abutment is connected:
- Healing abutment: First, a healing abutment is placed through the gum to shape the soft tissue around the future crown. This remains for 2–4 weeks.
- Definitive (final) abutment: A custom-milled (CAD/CAM) or prefabricated abutment is torqued onto the implant at 25–35 Ncm. Custom abutments provide superior emergence profile and esthetic outcomes, especially for anterior (front) teeth.
- Cost: Stock abutments run $300–$500; custom-milled abutments cost $500–$900.
Step 7: Crown Fabrication & Final Fitting
The final appointment completes your implant restoration:
- Digital impression: An intraoral scanner captures a precise 3D model of the abutment and surrounding teeth — no messy impression material needed.
- Crown fabrication: A dental lab or in-office milling unit fabricates the final crown from your chosen material. Options include porcelain-fused-to-zirconia, monolithic zirconia, or lithium disilicate (e.max).
- Cementation or screw-retention: The crown is either cemented onto the abutment or secured with a small screw (which allows easier future retrieval). Screw-retained crowns are increasingly preferred by implant specialists.
- Bite adjustment: Final occlusal refinement ensures the implant crown sits in harmony with your natural bite.
Recovery Timeline: Day-by-Day Guide
What to Expect at Each Stage
Understanding the typical recovery trajectory reduces anxiety and improves compliance:
| Timeframe | What to Expect |
|---|---|
| Day 1–3 | Peak swelling, mild to moderate discomfort manageable with ibuprofen/acetaminophen. Soft foods only. Apply ice packs 20 min on / 20 min off. |
| Day 4–7 | Swelling subsides. Bruising may appear. Sutures dissolve or are removed. Continue soft diet. |
| Week 2–4 | Gum tissue heals over implant site. Gradually resume normal diet (avoid hard/crunchy foods directly on surgical site). |
| Month 2–6 | Osseointegration progresses. No visible changes, but bone is actively fusing to the implant surface. Follow-up appointment(s) scheduled. |
| Month 6+ | Abutment and crown placement. Full function restored. |
Get a personalized day-by-day recovery plan with our Recovery Timeline tool, and read our complete recovery guide for detailed day-by-day instructions, diet recommendations, and pain management strategies.
Risks, Complications & How to Avoid Them
Common Complications and Prevention
While dental implants have a 95–98% success rate, complications can occur. The most common include:
- Infection (peri-implantitis): Similar to periodontitis, this bacterial infection around the implant can cause bone loss and eventual implant failure. Prevention: meticulous oral hygiene and regular professional cleanings.
- Nerve damage: Improper implant placement in the lower jaw can damage the inferior alveolar nerve, causing numbness or tingling in the lip, chin, or tongue. Prevention: CBCT-guided surgical planning.
- Implant failure: Failure to osseointegrate occurs in 2–5% of cases, most often linked to smoking, uncontrolled diabetes, or premature loading. Read our in-depth analysis of all 8 causes of implant failure and how to prevent them.
- Sinus perforation: During upper jaw implant placement, the maxillary sinus membrane may be perforated. Prevention: proper sinus lift technique when indicated.
Ready to take the next step? Explore our complete cost guide, compare implant brands, or calculate your investment with our Cost Calculator. If you're weighing alternatives, see our implants vs dentures comparison.
Guided Surgery vs Freehand Placement: Accuracy & Outcomes
Modern implant dentistry offers two surgical approaches. The International Team for Implantology (ITI) recognizes both as clinically viable, but guided surgery offers measurable advantages in specific scenarios:
| Factor | Freehand Placement | Guided Surgery (Template) |
|---|---|---|
| Accuracy (angular deviation) | 4–8° | 1–4° |
| Planning method | 2D panoramic X-ray or CBCT | CBCT + software + 3D-printed guide |
| Surgery time per implant | 30–60 minutes | 15–30 minutes |
| Incision required? | Yes (flap elevation) | Often flapless (tissue punch) |
| Best for | Simple single-tooth cases in good bone | Multiple implants, aesthetic zone, compromised anatomy |
| Additional cost | None | $300–$800 for guide fabrication |
Guided surgery uses CBCT data processed through planning software (Nobel Clinician, DTX Studio, or Blue Sky Plan) to produce a 3D-printed surgical template that fits over the teeth and gums. The template has precision drill sleeves that ensure each osteotomy is within 1–2 mm of the planned position. Ask your surgeon whether a guide is recommended for your case.
Immediate Loading vs Delayed Loading: When Can You Get Same-Day Teeth?
Immediate loading — placing a temporary or definitive prosthesis on the same day as implant surgery — is increasingly popular but not universally applicable. The ITI SAC Classification and clinical guidelines define when each protocol is appropriate:
- Immediate loading (same-day teeth): Requires high primary stability, typically measured by insertion torque ≥ 35 Ncm and/or an Implant Stability Quotient (ISQ) ≥ 70 using resonance frequency analysis (Osstell). Best suited for patients with dense bone (D1–D2), using implant systems designed for high-torque placement like Straumann BLX or Nobel Biocare NobelActive.
- Early loading (6–8 weeks): A middle ground where the prosthesis is placed before full osseointegration but after initial bone response. Requires ISQ ≥ 60 and favorable bone conditions. Surface technologies like SLActive® have enabled clinically reliable early loading.
- Conventional/delayed loading (3–6 months): The most conservative and well-documented protocol, with the highest evidence level. Recommended for compromised bone quality (D3–D4), grafted sites, smokers, and diabetic patients.
Clinical note: Regardless of loading protocol, the prosthesis must be placed out of direct occlusal (biting) contact during the healing period. Premature loading is the second most common cause of implant failure after peri-implantitis.
Post-Operative Care: Your First 48 Hours Checklist
Evidence-Based Recovery Protocol
The first 48 hours after implant surgery are critical for uneventful healing. Follow this evidence-based checklist, consistent with ADA and AAP post-surgical guidelines:
- Ice application: Apply ice packs to the external cheek/jaw area in 20-minute on/off cycles for the first 24 hours. This significantly reduces peak swelling (typically day 2–3).
- Pain management: Take ibuprofen 400–600 mg every 6–8 hours (if no contraindications) starting before the anesthesia wears off. Alternate with acetaminophen 500 mg if needed. Prescription opioids are rarely necessary for single-implant cases.
- Diet: Soft foods only (yogurt, smoothies, scrambled eggs, mashed potatoes) for 7–14 days. Avoid hot liquids for the first 24 hours. Do not use straws (suction can dislodge the blood clot).
- Oral hygiene: Do not brush the surgical site for 48 hours. Use the prescribed chlorhexidine (0.12%) rinse twice daily starting 24 hours post-surgery. Continue brushing other areas normally.
- Activity: Rest for the first 24–48 hours. Avoid strenuous exercise, heavy lifting, and bending over for 3–5 days. Sleep with your head elevated on 2–3 pillows to minimize swelling.
- Avoid: Smoking (minimum 2 weeks, ideally 6+ weeks), alcohol (48 hours), and touching the surgical site with your tongue or fingers.
- Warning signs: Contact your surgeon immediately if you experience uncontrolled bleeding after 4+ hours, fever above 101°F (38.3°C), numbness persisting beyond 24 hours (possible nerve involvement), or pus/foul odor from the surgical site.
Use our interactive Recovery Timeline tool to track your healing day by day, or explore the full cost breakdown to understand what you're paying for at each stage. Compare implant brands to understand how surface technology affects your healing timeline, find ways to reduce your total cost, or see how implants stack up against dentures as an alternative. Check local pricing in your state: California, Texas, New York, Florida.
The Complete Dental Implant Procedure: Step by Step
A dental implant procedure involves 6 distinct stages. Here is what happens at each stage, including timing, what you will experience, and what to expect:
Stage 1: Initial Consultation and Digital Planning (Day 1)
Your dentist will conduct a thorough evaluation including:
- Comprehensive oral exam — evaluating gum health, existing teeth, and bite alignment
- CBCT (Cone-Beam CT) scan — a 3D imaging scan that maps your jawbone density, volume, nerve locations, and sinus proximity with sub-millimeter accuracy
- Medical history review — identifying medications, conditions, and risk factors (diabetes, bisphosphonates, blood thinners)
- Digital treatment planning — AI algorithms analyze your CBCT scan and recommend optimal implant size, angle, and position. In 2026, this technology has significantly improved first-time success rates.
Duration: 60–90 minutes | Pain: None (diagnostic only)
Stage 2: Preparatory Procedures (If Needed — 1–6 Months Before Surgery)
Not all patients need this stage. Preparatory procedures may include:
- Tooth extraction — removing the damaged tooth or root fragments. Healing: 4–8 weeks.
- Bone grafting — adding synthetic or donor bone material to build up insufficient jawbone. Healing: 3–6 months before the implant can be placed. Required for approximately 30% of implant patients.
- Sinus lift — for upper jaw implants where the sinus floor is too close to the implant site.
- Periodontal treatment — gum disease must be treated and stabilized before any implant surgery.
Stage 3: Implant Placement Surgery (Day of Procedure)
This is the main surgical event. Here is what happens minute by minute:
- Anesthesia (5–10 min): Local anesthesia numbs the surgical area. IV sedation or nitrous oxide is available for anxious patients. You will be awake but feel no pain.
- Incision (2–5 min): A small incision is made in the gum tissue to expose the jawbone. With guided surgery, a custom 3D-printed surgical template is placed over the gums for precision.
- Osteotomy (10–15 min): A precisely calibrated drill sequence creates a channel in the jawbone matching the exact diameter and depth of the implant. Guided surgery ensures the drill follows the pre-planned trajectory to within 0.5mm accuracy.
- Implant insertion (5–10 min): The titanium post is threaded into the prepared channel using a torque wrench. The surgeon monitors insertion torque (typically 25–45 Ncm) — a critical metric that determines if immediate loading is possible.
- Closure (5 min): The gum tissue is sutured over the implant. A healing cap may be placed.
Total surgery time: 30–60 minutes per implant | Pain: Minimal (less than a tooth extraction for most patients)
Stage 4: Osseointegration — The Healing Phase (3–6 Months)
This is the longest stage. The titanium implant gradually fuses with your jawbone at the cellular level — a process called osseointegration.
| Timeline | What's Happening | What You Experience | Care Instructions |
|---|---|---|---|
| Days 1–3 | Blood clot forms; initial inflammatory response | Mild swelling, slight bleeding, manageable discomfort | Ice packs, soft foods, prescribed pain medication, no smoking |
| Days 4–14 | Early bone cell migration to implant surface | Swelling subsides; discomfort decreases significantly | Gentle brushing (avoid surgical site), warm saltwater rinses |
| Weeks 3–6 | New bone formation (woven bone) around implant | Normal eating on opposite side; suture removal (if not dissolvable) | Resume normal oral hygiene; avoid hard foods at implant site |
| Months 2–4 | Woven bone remodels into stronger lamellar bone | No symptoms; implant site feels normal | Regular dental checkups to monitor integration |
| Months 4–6 | Full osseointegration achieved; implant is stable | Ready for next stage | Dentist verifies stability with torque test or resonance frequency analysis |
Factors that affect healing time: Bone density (denser = faster), smoking (slows healing 30–50%), uncontrolled diabetes (HbA1c > 8% impairs bone healing), implant location (lower jaw typically heals faster), and age considerations (seniors may need 5–6 months).
Stage 5: Abutment Placement (15–30 Minutes)
Once osseointegration is confirmed, the abutment — a small connector piece — is attached to the implant post. This involves reopening the gum tissue, attaching the abutment, and allowing the gums to heal around it (1–2 weeks). Impressions for the final crown are taken at this appointment.
Stage 6: Final Crown Placement (30–45 Minutes)
The custom-fabricated porcelain or zirconia crown is permanently cemented or screwed onto the abutment. Your dentist adjusts the bite to ensure comfortable occlusion. You walk out with a fully functional, aesthetically matched new tooth.
Guided Surgery vs Freehand Placement: 2026 Standard of Care
Modern dental implant placement increasingly relies on computer-guided surgery, which uses your CBCT scan to create a virtual surgical plan and a 3D-printed guide that directs the drill with extreme precision.
| Factor | Guided Surgery | Freehand Placement |
|---|---|---|
| Accuracy | ±0.5mm deviation (implant position) | ±1.5–2.0mm deviation |
| Surgery time | 20–40 min per implant | 30–60 min per implant |
| Incision size | Often flapless (no gum incision needed) | Requires gum incision |
| Complication rate | Reduced nerve injury and sinus perforation risk | Higher risk in complex anatomy |
| Additional cost | $200–$500 for the surgical guide | No additional cost |
| Best for | Complex cases, limited bone, anterior aesthetics, multiple implants | Simple, straightforward single implant in adequate bone |
In 2026, guided surgery is becoming the standard of care for all but the simplest single-implant cases. Ask your dentist if they offer guided placement — the slight additional cost typically results in better outcomes and faster healing.
Immediate Load Protocol: Same-Day Teeth
The immediate load protocol allows patients to receive a temporary crown or full-arch restoration on the same day as implant placement — eliminating months of living with a gap or wearing a temporary denture.
How It Works
If the implant achieves sufficient primary stability at placement (insertion torque ≥ 35 Ncm), a temporary crown can be attached immediately. The permanent crown replaces it after full osseointegration (3–6 months).
Who Qualifies
- Good bone density and volume (no grafting needed)
- Non-smoker or willing to quit during healing
- Good general health; controlled chronic conditions
- Commitment to soft-food diet for 8–12 weeks
- Single tooth replacement or full-arch (All-on-4) are most suitable — partial replacements are less predictable
Success rate: When properly selected, immediate load implants achieve success rates comparable to conventional protocols (95%+). However, careful case selection by an experienced surgeon is essential.
Learn more: Same-Day Dental Implants guide →
Potential Complications: What You Need to Know
While dental implants have a 95–98% success rate, being informed about potential complications helps you make the right decision and recognize warning signs early:
Early Complications (Within 6 Months)
| Complication | Frequency | Cause | Warning Signs |
|---|---|---|---|
| Implant failure (non-integration) | 1–2% of cases | Poor bone quality, infection, overloading, smoking | Implant feels loose; persistent pain after 2 weeks |
| Surgical infection | 2–5% of cases | Bacterial contamination during/after surgery | Increasing pain, swelling, fever, pus discharge |
| Nerve injury | <1% (with guided surgery) | Implant placed too close to inferior alveolar nerve | Numbness, tingling, or burning in lip, chin, or tongue |
| Sinus perforation | 1–3% (upper jaw only) | Implant penetrates sinus membrane | Nasal congestion, sinus pressure, air escaping through nose |
Late Complications (After 1+ Year)
- Peri-implantitis: An infection of the tissue around the implant, similar to gum disease. Affects approximately 10–20% of implants over 10 years. Prevented by consistent oral hygiene and regular dental checkups.
- Mechanical failure: Screw loosening, abutment fracture, or crown chipping. Occurs in <5% of cases and is typically repairable.
- Bone loss around implant: Progressive bone resorption at the implant site, often linked to peri-implantitis or excessive bite forces.
When to call your dentist immediately: Persistent pain beyond 2 weeks, fever, pus or unusual discharge, implant feels mobile, numbness that doesn't resolve within hours after surgery.
2026 Technology Making Implants Safer and Faster
- AI-assisted treatment planning: Machine learning algorithms analyze CBCT scans to recommend optimal implant position, predict bone quality, and flag anatomical risks — reducing human error in surgical planning.
- Robotic implant surgery: Robotic systems (e.g., Yomi by Neocis) provide real-time haptic guidance during drilling, preventing deviation from the pre-planned trajectory. Currently available at select practices.
- 3D-printed custom implants: Patient-specific implant designs manufactured with additive manufacturing to match individual anatomy precisely, reducing the need for bone grafting in some cases.
- Bioactive surface coatings: Next-generation implant surfaces (e.g., SLActive by Straumann) promote faster bone cell attachment, potentially reducing osseointegration time from 6 months to 3–4 months.
- Smart implants with embedded sensors: Emerging technology allowing real-time monitoring of healing, bone integration, and bite forces — alerting dentists to potential complications before they become serious.
To compare the implant brands and technologies available to you, visit our brand comparison guide or use the brand comparator tool.